We use cookies to make your experience better. To comply with the new e-Privacy directive, we need to ask for your consent to set the cookies. Learn more.
How to lay laminate flooring

This laminate flooring installation guide will help you choose the right floor, install and maintain the flooring in your home, office, commercial or public areas.
Before you decide to take on this challenge be aware that this is not an easy job. We class this type of project with a difficulty rating of ‘medium’ requiring an intermediate level of DIY skills.
Safety Precautions: Before you begin ....

Before taking on any project of this type we advise to take safety precautions first:
- Avoid breathing in dust while cutting wood by wearing a dust mask
- Protect your eyes to avoid contact with particles by wearing safety glasses while using machines such as circular saws and jigsaw or mitre saws.
- Protect your knees from kneeling for extended period of time by wearing knee pads.
- Use a RCD device when using any Power Tools
Step 1: Is laminate flooring a suitable choice?
Before buying the product you need to establish if your space is suitable to accept the particular type of laminate flooring you intend to purchase.
Your sub-floor must be reasonably level and free from excessive exposure to damp.
Most laminated wood products are suitable for living rooms, hallways and dining rooms so if this is where its going to be installed then no worries.
TIP: Although you can buy waterproof laminated flooring for bathrooms and kitchens, depending on your type of use they may require a more water tight solution with click systems to avoid water seeping through the edges of the planks. In such cases you may want to consider LVT Flooring which are more purpose built for bathrooms with better and tighter water sealing click systems.
Step 2: Measuring your area
a. Measure the widest length and width from wall to wall making sure you go deep into chimney breast recesses and any bay windows you may have.
b. Multiply the two measurements together to calculate the area.
Example: Width X Length = Area²
e.g. 9.5m X 4.9m = 46.55m²
c. You will know how many packs you require by diving the pack coverage area into your room area.
Example: Room Area² / Pack coverage area² = No. of Packs required
e.g. 46.55m² / 2.65m² = 15.57 packs
If you don't get a whole number like the example above 15.57 you should purchase the next whole pack as in this example it would be 16.
TIP: Try to buy an extra pack as mistakes do happen and sometimes you could get a few defected pieces. To ensure you dont get left stuck with less flooring planks towards the end of the project its always safer to buy an extra pack.
Step 3: Shopping for Materials
This is an important step to get right as you want to buy the right combination that is suitable for your project.

Choosing the right laminate flooring
If you have already purchased the floor we don't want to put you off here but it is important you understand the significance of the right thickness, type and finish of the flooring product as it will be particularly suited for different areas.
It's worth noting that laminate flooring is a machine processed product made from wood particles with a photographic film layer at the top to achieve a desired effect. Unlike real wood floors they do not have a single natural wood layer so therefore can’t be sanded or treated.
The best laminate flooring products are those that are over 12mm thickness with an AC3 rating and above and has a click system profile.
TIP: Buy Click Laminate Flooring to make it easy for you to click individual pieces together when joining two planks which means it makes the whole installation easier than manually ensuring the joints are level.
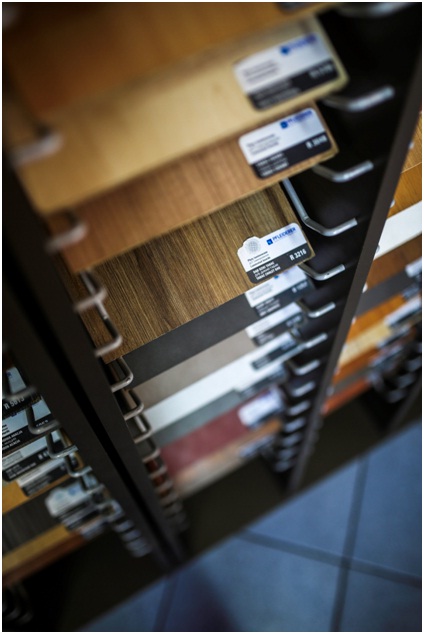
Make sure you have ordered the right shade of colour to complement the interior and decor. If you haven't seen the floor in flesh you can always order a sample so you can appreciate the real thing in your hands and how the shade reflects in the room where you are about to install the flooring.
Choosing an UnderlayAn underlay adds sturdiness, insulation and provides a protective layer between the sub-floor or boards and your laminate floor.
Choose the most appropriate underlay according to the conditions of the sub-floor.
- Foam Underlay
Only 3mm thin, doesn’t provide much insulation but may do the job if the areas is already well insulated and floors that are dry and level.
- Combined Underlay
Thicker 5mm underlay made with combined and more structurally resistant material providing reasonable insulation.
It can mask over slight irregularities and unlevel floors.
For the above types make sure you tape the edges of each strip together to keep it damp tight.
- Fibreboard Underlay
Ideal when you have floorboards or uneven sub-floor and good heat and sound insulation is an important requirement. If you are will be using fibreboard then ensure you stagger the joints. As this underlay may expand Leave 10mm gaps around the edges of the room walls and 5mm in between each piece.
Skirting
A decorative feature suited for areas desiring a cosy and homely feel to the room.
If you already have skirting be sure you have enough space to install the laminate flooring under.
Beading
This is the easiest option as you can simply nail the strips of beading directly above the flooring and they can be useful to fill any gaps left under a skirting board.
Door bars and pipe surrounds
A door bar may be necessary if two adjoining areas have different floor height and this strip can mask the uneven joins and also lift the gap on the closing position under the door.
Pipe surrounds neatens the finish in case you have a jiggered circular cut or larger than required gap around pipes.
Step 4: Preparing the sub-floor
This step will depend on which sub floor you have underneath and the type of flooring you are about to lay.
Concrete Sub-floor
Ensure that the concrete is moisture free by using a moisture meter or compressing a polythene film material with a heavy weight on top of the concrete floor for a 24 hours to see if the film has dampened or discoloured. If you find damp or moisture you must seek professional help and advice and resolve any moisture related issues before laying your flooring. A synthetic floor that is manufactured from different profiles.
The concrete surface must be flat. Any small uneven areas can be levelled out using fibre board by If you have any ditched areas deeper than 2mm you must fill these using a compound you can buy in all major home improvement stores. Laminate Flooring is the most popular choice of flooring because of the extensive range of colours and designs, it’s good value for money, hard wearing, easy to install and maintain.
Newly laid concrete floor must be fully dried. Do not rush your flooring installation and ensure you have allowed at least 7-8 weeks for the concrete to fully dry depending on the thickness of the concrete.
Once you satisfied the above lay down a layer of damp proof membrane (DPM) all over the concrete overlapping the edges to avoid exposing the concrete with movement when laying your underlay and flooring.
Timber boarded sub-floor
Make sure the wooded boards are flat not exceeding any more than 2mm in variation of height as these can be levelled out by fibreboard.
Make sure the timber is dry and damp free. If you spot any signs of moisture you must replace the planks and nail them down securely.
If you find some boards are creaky or lifting this is the best time to replace or nail them down firmly.
Step 5: Quick Checklist
Before you dive in make sure you have all the necessary tools and material to avoid abandoning your project half way to run to the DIY store. Below is a generally what you will need to run a smooth installation but you can make do without a few as you choose.
| Materials: | Tools: | Safety Equipment: |
| Laminate Flooring | Floor Spacers | Dust Mask |
| Underlay | Tape Measure / Ruler | Safety Glasses |
| Scotia beading or skirting | Mitre Saw | Knee Pads |
| T-bars | Combination square with spirit level | |
| Glue / Adhesive | Drill with flat wood bit | |
Step 6: Installing your Laminate Flooring

Please note that the following steps are a general guide to laying your laminate flooring but you should always read the manufacturer’s instructions before continuing as there may be some specific advice related to the product.
TIP: Leave the underlay and flooring inside the room for 48 hours allowing it to naturally acclimatise by expanding to its desired form.
1. Lay the underlay
Lay the underlay side by side across the entire floor trimming the edges to fit against the wall but make sure you leave a 10mm-15mm gap around pipes to allow access and avoid any unfortunate dampening from leaks. HDF cores with one thing in common, a laminated photographic image or graphical top layer that is designed to give the finished look of wood or any desired effect.
This is totally your choice to make but here are a few tips to help you decide:
- If you are continuing with an open plan area or if you have laminate flooring in adjacent rooms then you should align your planks in the same direction
- If you have a long shaped room lay them consider laying the planks in the same direction as the longest wall in the room.
- If you have a relatively square room it is best to lay in the direction towards the light entering window or door.
- If you already have skirting that is not desired, remove it before starting to laying your floor and nail in new skirting to sit on top of the new flooring to get a nice clean finish. If prefer to keep the same skirting then ensure there is sufficient gap under it to slot the flooring otherwise you will need some similar colour trimming to cover the gaps
- Make sure the area is clean and dirt-free.
- You will notice either side of the plank has slightly different patterned edges. One side will be a “tongue” and the other will be a “tongue and groove”. The opposites are designed to fit the planks together helping them to stay down. If you product doesn’t “click” and lock together on the edges you should apply adhesive to fix the edges together.
- Start laying from a corner in the direction you have decided with the “tongue” facing the wall.
- Use approx. 12mm wide spacers in between the wall and plank at 50cm intervals (check manufacturer’s instructions).
- Complete the row sawing off the end after marking it straight using a combination square.
- Using the off cut left from the previous row, position it next to the first plank you laid down so that the bottom line is not in line to the adjacent plank creating jiggered horizontal lines with at least 35cm difference.
- Make sure you join the opposite grooved edge to lock the planks into place.
- Work your way down the row and repeat steps (iii) to (vi) going across the room row by row firmly pushing by hand or tapping the planks against each other using a mallet if recommended by the manufacturer but be careful not to apply too much pressure causing them to lift up at the joins.
You will most likely have an odd space remaining between the last row you have laid and the wall so each plank needs to be marked individually for cutting.
There is a clever method on getting this perfect because not all walls are straight so follow these steps carefully.
- Starting from the bottom or top, position a spare plank directly aligned over the previously laid one making sure the gap is still fully revealed as before.
- Then lay another plank on top of that one but pushed firmly against the wall covering the entire gap.
- Using a pencil mark a line against the edge of the top plank so you are marking the plank beneath it which is the one you positioned directly above the originally laid plank.
- Cut the plank you have marked and using a mallet tap it tightly into the gap.
- Work out how much gap you need to saw from the bottom of the architrave or mouldings. You can do this by slotting a thin ruler in the gaps created against the wall making sure you hit the sub-floor or calculate the depth of the underlay and flooring planks and in either case make sure you add another 2mm to allow for movement.
- Repeat the same process (i) to (iv) going along the final row against the wall to cut out the each plank exactly measured for the required gap all the way across the wall.
Step 7: Finishing Touches

Saw off the amount required to slot the flooring planks firmly under the architrave or moulding.
- Mark the position of the pipe over the flooring plank.
- Remove the spacers, use the floor and allow it to expand over a few weeks to see if the gaps bother you. In either case you can finish off the edges by nailing down trips of scotia beading around all the walls or just around certain areas such as fire surrounds, patio doors or any steps you may have.
- Using a wood drill bit of at least 10mm larger than the pipe diameter drill out a whole from the laminate in the position of where the pipe will fit through.
- Starting from the edge of the plank at a wider point draw an angled line coming into the edge of the circle on both sides.
- Using a mitre saw, along the lines and you will release a triangular piece with a curved bottom.
- Place the flooring plank to fit around the pipe and place the cut out triangular piece behind the pipe against the wall to finish off neatly.
- Do not glue the edges in case you need to free the space for any pipe maintenance.
Doorways
If you have an uneven height floor on the other side of the door then make sure you leave a gap to slot in a t shaped door bar that not only covers the gap but also masks the rise in height between the two areas.
If the laminate flooring meets carpet or permanent rug such as in a hallway in front of the door use a metal strip to safely avoid either materials lifting up and creating a noticeable edge to avoid tripping over.
Trims / Beading
This one is optional.
If you have skirting and have left gaps in between the flooring and the skirting that looks ugly then you can cover them up by nailing the beading into the skirting.
TIP: Make sure you nail the beading into the wall or skirting and not the flooring otherwise you are restricting the flooring to naturally expand or contract due to acclimatisation.
Final Tips
- Replace the spacers with pieces of cork which allow the laminate flooring to expand and contract instead of leaving a gap which may cause the planks to move and bulge at the joins.
- Leave the laminate flooring out in the room to allow it to acclimatise before you lay it which means it is set for the room and will most likely not change after it is installed
There you have it, a complete professional laminate flooring installation guide with all the necessary tips to equip you with everything you need to know when laying you laminate flooring.
Good luck :)
 0121 328 5391


